Wednesday, March 16, 2011

Baby Blanket Tutorial


This is really for Amy (Hi Amy!!) who requested a tutorial for a self binding baby blanket I made. Here is my second one and I am glad to do my FIRST tutorial since the directions I followed were very hard to follow. I ended up ripping every single seam I did and started from scratch.

It was totally fun, just in case you were wondering.

I didn't use photoshop to edit any pictures, so excuse the lighting or whatever.

What you need:
2 coordinating fabrics that you love.  They both need to be squares. Whatever size you do, make the smaller one 10 inches smaller. Mine were 44 inches square and 34 inches square.
You can go 50 inches square and 40 inches square.
29.5 and 39.5.
Whatever.

The point is you need two squares of fabric. Differing by 10 inches.

Next you will fold them in half and pin the halfway mark. On all 4 sides, on both pieces of fabric. (Don't skip this step, or you will be swearing later on.)


The pin is best put on the wrong side of the fabric. You can do it the other way, but this is easier. And I am all about easier.


Then, matching the RIGHT sides of your two squares of fabric, match up the pins at the middle.


And starting at the middle, pin them together working your way out to the edge.


Go back to the middle and pin all the way to the OTHER edge.

 This is what your one side will look like. Notice all the extra fabric?? Don't worry about it for now.


You will now match up the OTHER 3 sides the same way you did the first side.


 This is what the corners will look like. You'll have triangle thingy's. You need those for the pretty mitered corners.


All pinned up with weird corners. This is what you should look like now.


DON'T SKIP THIS STEP!!!
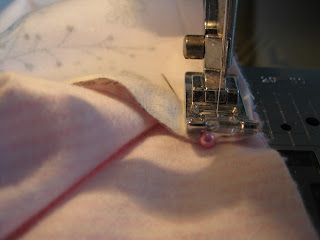
Start sewing IN THE MIDDLE out to the edge. Then go back to the middle and sew out to the OTHER edge. You will have one side done. Repeat for the 3 remaining sides.

Did I mention to NOT SKIP THIS STEP!!!


Stop about 1/4 inch away from the edge of the smaller square.


Make sure to leave one side open in the middle so you have room to flip your blanket!


 Here's the "hard" part. The corners. I swear it took me 3 weeks to figure these stupid corners out. Then I realized the corners weren't stupid - I was.

Using the larger square of fabric, fold it in half at a corner so you make a triangle at the edge with the larger square fabric on the outside.


**The pictures are better than words at this point**

Then fold the little corner in so that you have a fold from the stopping point where you sewed to the flat edge where you folded the blanket in half. The KEY is to make a 90 degree angle on the folded part. Check out the pics.


Unfold it.


That line is where you sew.


 Got it?! Now repeat with the remaining 3 corners.

Then...


Use the hole you left to flip the blanket right side out, and use your fingers to push the corners out so they look pretty.


Then iron that baby.


Pin your opening and get ready to do the finishing touches.


Top stitch or you can do a different kind of stitch to make it interesting.


Go all the way around so it doesn't shift around when it's washed.


Iron one final time and you are DONE.


Sunday, March 6, 2011

Apple Fritters

It's official.

I'm in love with someone else. Don't tell my husband. Oh, and it's a girl.

Have you met the pioneer woman??

Her apple fritters are...

to.
die.
for.

I'm not even going to pretend that I messed with her recipe. So here it is. In it's entirety.


Ingredients

  • FRITTERS
  • 2 cups All-purpose Flour
  • ½ cups Sugar
  • 3 Tablespoons Sugar
  • 2-¼ teaspoons Baking Powder
  • 1-¼ teaspoon Salt
  • 2 teaspoons Ground Cinnamon
  • 2 whole Large Eggs
  • ¾ cups Whole Milk
  • 2 teaspoons Vanilla Extract
  • 2 Tablespoons Melted Butter
  • 2 whole Granny Smith Apples, Peeled And Diced
  • Powdered Sugar (optional, For Dusting)
  • GLAZE (optional)
  • 1-½ cup Powdered Sugar
  • ¼ teaspoons Salt
  • ¼ teaspoons Vanilla
  • ¼ cups Milk

Preparation Instructions

In a mixing bowl, combine flour, sugar, baking powder, cinnamon, and salt.
In a separate bowl, beat the eggs with a fork, then add milk, melted butter, and vanilla.
Gently fold dry and wet ingredients together until just combined (do not overmix.) Fold in apples. Add enough apples to make a very chunky batter. You want the apples to shine though!
Heat a couple of inches of canola oil over medium to medium-low heat. When it gets hot, drop a little drop of batter into the oil. If it sizzles immediately and rises to the top, the oil is ready; if it burns quickly, turn down the heat.
Drop teaspoons of batter into the hot oil, six or eight at a time. Sometimes they’ll flip over by themselves; sometimes you have to flip them. Just watch them and make sure they don’t get too brown, but cook them long enough to make sure the batter’s cooked through, about 2 to 2 1/2 minutes total.
Remove and drain on a paper towel. Dust very generously with powdered sugar, or dip fritters in a light doughnut glaze (mix all glaze ingredients together, then dunk warm fritters).
Serve warm!

Verdict - hide them from your kids. Or else make a double batch. Trust me.
Dave's Rave's - Yeah. There's worth it!!! And, can I eat the whole batch?? Please?

Thursday, March 3, 2011

Yummy peanut butter protein bars!

  With Dave and I both into the exercise area as our hobbies, we are attempting to incorporate more protein so that our muscles can rebuild and we can stay full for longer periods of time.

Enter: the protein bar.

They are SO expensive to buy and have all these weird ingredients that I can't pronounce. And THEN, I found a recipe for HOMEMADE protein bars!!!

source: floating around on fitness blogs

Take 2 Cups of peanut butter and place in a large glass bowl. (you can use all natural)

Add 1 3/4 Cups honey. (the real stuff, make sure there is no added corn syrup)

Microwave for 90 seconds.

Stir until smooth.

Add 2 1/4 Cups vanilla whey protein powder. (something like this)

Stir until smooth and incorporated.

Add 1 cup oats. Stir until smooth.

Put into a 9x13 pan (for thin bars) or a 8x8 (large, thick bars) and put in fridge until set up.

That's it!!

And they are SO. GOOD.

Seriously.


Continuing the Carrot Theme: Carrot Cookies

Here's another great one to use carrots and to get your kids some more vegetables!

Cream together the following ingredients:
3/4 Cup Sugar
3/4 Cup Shortening
1 Egg

Then Add:
2 Cups Flour
2 tsp. Baking Powder
1/2 tsp. Salt
1 tsp. Vanilla
1 Cup Shredded Carrots (I use my bosch attachment and make them finely shredded)

Roll into balls and place on cookie sheet. Bake @ 350 for 12-15 minutes. Then drizzle with orange glaze if desired (YES I DESIRE PLEASE!!).

Orange Glaze:
1 Cup Powdered Sugar
3 tsp. Orange Juice
Pinsh of Salt
Orange Peel (opt. I usually leave this out and you can't tell the difference)

This is a recipe from my mother-in-law. My husband ate these a lot as a kid and he still loves them. My kids and I eat them anytime we have some carrots to get rid of!

Carrot Salad

Carrots are my favorite raw vegetable. And I think my kids would like them better but unfortunately they're really hard for my 3 and 2 year old to eat. So here's a great salad that even my picky eaters LOVE. It sounds crazy but give it a try and you might love it too!!


Carrot Salad

2-3 cups of shredded carrots (I prefer finely shredded and I have a bosch attachment for it)
Raisins
Italian Dressing

Mix carrots with your desired amount of raisins (about a cup). Then add enough Italian dressing just to moisten it (I start with about 3-4 Tbs. and keep adding until it looks just moistened).

With raisins in it my kids don't even care and this is my husband's favorite salad!! He usually asks me to double it so he can take some to eat at work for a few days!